Here is a quick guide on how to record your screen in your Windows 11. All the steps and methods are explained very easy and simple way.
So, make sure you read this article until the end to get complete information.
Overview:-
1) You can record your screen with MS PowerPoint.
2) You can record your screen with the Xbox game bar.
Method – 1 How to record screen on Windows 11 with MS PowerPoint
Those who don’t know this, let me tell you that you can RECORD their Windows SCREEN with the help of the MS PowerPoint application.
It’s very simple and easy to record your screen with this Method.
We are listing the steps on how you can do that below.
Steps
1) Firstly, open the MS PowerPoint application.
2) Now, open a Blank Presentation.
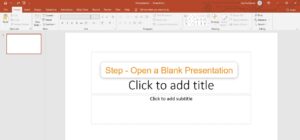
3) Go to the insert tab > Media section (extreme upper right side) > Video, Audio and Screen Recording > Click on Screen Recording.
4) The screen recording dialogue box will now show, as shown in the screenshot below.

5) Select the Area from where you want to record your screen,
6) After that, click on the RECORD button to start.
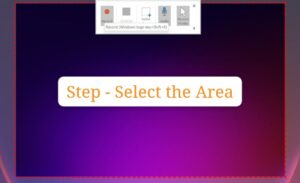
7) Once your recording finishes, press the Windows + Shift + Q shortcut key or tap on the STOP button.
8) That’s it, your screen recording is automatically inserted in your presentation.
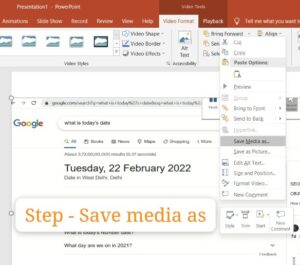
9) To save your video > Right-click on that video > click on Save Media As > Now save your recording at your desired place in MP4.
Also Visit:- Category Tech
Method -2 Steps for recording your windows screen using the Xbox game bar
Did you guys know that the Xbox Game Bar in Windows 11 offers a screen recording feature?
You will use it to record a video of your activities in almost any Windows software on your computer or laptop, whether you want to record games or make a Microsoft Office lecture or want to make some tutorial for somebody.
Below this, we have listed those easy steps by which you can record window screen easily in Windows 10 and 11.
The screen recording function is included in the Xbox software, which comes pre-installed with Windows 10 and 11.
Xbox Game Bar has made massive changes in its application, making it easier to use.
It has now Includes the option to capture screenshots and even create memes.
Steps
1) Open the application or project which you want to record.
2) Press the Windows key + G to open the SCREEN RECORDING dialog.

3) You will see a dialog box like this on the upper left side.
4) Click on the third / 3rd button to start screen recording.
Or, you can use the shortcut key of Windows + Alt + R to start recording your screen.
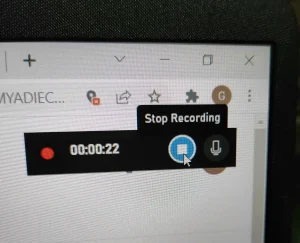
5) Now, you will see the SCREEN RECORDING dialogue like this.
6) To stop or end your recording, click on the STOP RECORDING button as shown in the below screenshot.
7) That’s it, your screen has been successfully recorded.
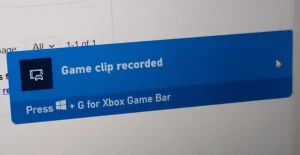
8) You can check your recording under:-
a] Xbox game bar > Gallery option b] File Manager > Windows (C)
Also Visit:- Category Tech
FAQs
YES, you can screen record your desired application or project easily by using a) MS Powerpoint and b) Xbox game bar
1) You can record your screen with MS Powerpoint.
2) You can record your screen with the Xbox game bar.
1) Go to the iOS Control Center.
2) Click on the RECORD button to start.
3) To end your recording, click on the Red Bar or Timer.
1) To start screen recording, use the shortcut key Windows + Alt + R.
2) Now your screen recording will start.
3) You will see the dialog box on the upper right side.
4) Press the Stop Recording key to end your recording.
5) You can check your recording under:-
a] Xbox game bar > Gallery option b] File Manager > Windows (C)
Final words
So that is all about How to Record Your Screen in Windows 10 and 11. We believe that reading this article has proven helpful for you.
And, you were able to know how to record our screen in Windows 10 and 11. Apply the same steps exactly which we have listed above.
Also, if you face any issues following the above steps and methods, let us know in the comments section below. All of the information in this article is collected from various sources.


